Showing posts with label spray paint. Show all posts

Sunday, July 31, 2011

Knot Too Shabby!

A new store just opened up in our quaint little city of Glendora, Ca. Knot Too Shabby Furnishings is located in the heart of Downtown Glendora just across the street from Blue Chair books one of our families favorite spots!  The owner of Knot Too Shabby is a friend of mine and she asked me months ago if I would like to add some of my "Savvy Crafty-ness" to her already booming Shabby-ness.  Well of course I jumped at the chance of "going green"! 

As you have seen in previous posts I love taking vintage furniture and making it new by painting it and/or adding designer fabrics to give pieces a new updated look.  With The Sew N Sew just downtown as well my favorite little sewing and quilting shoppe to get the best fabrics in town to make some one of a kind "Savvy" peices it's a win-win situation!

"Sew" what did I decide to do?????  Well a myriad of fun stuff of course!  Here is the before and after of a couple lamp shades.
I picked up 2 of these large shades at a yard sale, pretty plain jane don't you think?  This is what I did to them:
 This is a beautiful turquoise and black/brown Damask print with velvet trim in the center and pom pom fringe at the bottom.

This one is from a cute Michael Miller fabric with vintage kids, trimed in red and white. Simple and adorable for any kids room!

But you know me...matchy matchy as I am!  I had to do something for both of these items for accessories.
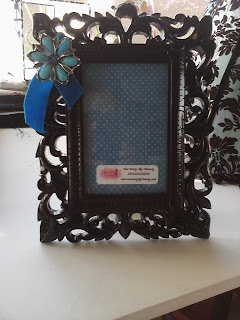
 I spray painted this frame, added the matching trim and then the jeweled butterfly.  I also put some of the fabric in the frame but it can be changed out for your own personal photo!

The chair is a perfect match to the lamp shade!  Simply gorgous!

I don't have a before photo of this lamp shade but it is a simple design, one you have all scene before I'm sure.  This one I am afraid to say is SOLD it went the next day after being put in the shop!

This one was oh so fun to do!  This was also a yard sale find, the beading at the bottom was already there and I wanted to keep it.  I added the leopard print, the trim and yes, that's Ostrich feather there that I use sometimes in my hair bow making!  Beautiful don't you think?  Here is the accessory for that one:
A beautiful thrift store find that got a make over with some paint, velvet trim and some bling!

Here is one more goodie!  The photo isn't very good but it's a lamp shade with flowers all over!
All in all there are quite a few more items at Knot Too Shabby that I brought in.  I also made some pillowcase dresses made out of Vintage pillowcases.  And many other fun things!  Stop by say hello to Michele and tell her Brandy sent you!

Wednesday, May 25, 2011

Living Room Make Over!

Remember those beautiful chairs I made over in early April?  Well both are all done and I took it a step further!  I did a little make over on my Living Room.  I had about 2 yards of that fabric left over.  So with the rest I recovered some throw pillows for the couches and a small piano bench.  Take a look!


I got this piano bench at an antique store for $15.00.  It was dark brown and dated.  So I spray painted it the same Ivory color as the chairs.  Then added the same fabric!  Walla~a nice new sitting area for us to put our shoes on in the morning!


Don't you love how everything matches!?  Since these photos I have also picked up a Oak rickety quilt rack from a second hand store for $10.00.  I spray painted that the same Ivory and added that to the Living Room as well.  My beautiful room is now complete!

Chair Make Over for Rattle N Roll!

My dear friend Suzy asked me to do a "make over" on this chair.  Boy did it need one!  I was so excited to get moving on it that there are many before photos.  But the chair was a old ugly brown with beige velvet fabric.  The chair obviously lived in a home with kiddo's! LOL!

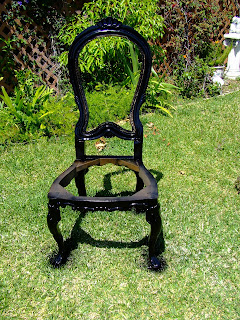
Suzy and I decided that the chair would be put in her Rattle N Roll store.  A super adorable children's boutique that by the way carries Sew Savvy by Brandy bows!  So the chair needed to reflect a "Rocker" flair.  Sooo...black shiny spray paint was called for. 

After the paint it was time for the staple gun!


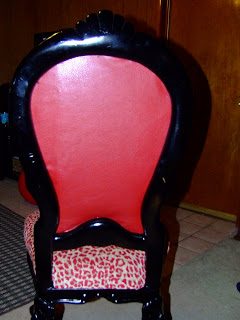
Oooooh La La!!!!  This gold and red upholstory fabric is HOT!!!!   I have a friend who gave this sample to me and it came with a piece of red leather so I put that on the back.


It is a "Rockin" chair don't you think!  And my payment?  She has 3 more of these babies and one is mine!!!!  Hmmmmm what should I do with the next one????

A New Desk for Xander!

My little guy Xander starts Kindergarten in September this year.  So I have been thinking of buying him a desk and getting him ready for the "homework process".  I am a HUGE believer in recycling old furniture and making it new.  And one day I was driving along and saw this desk on the curb and it called to me!  I know its got an old look, but with a little new spray paint I knew I could make it work.


Here is a look at the totally 70's drawers!  The hardware gave me a "hard" time and didn't want to come off.  They were rivited in!


So what color did I choose?  RED!

The grass got a nice new look too! LOL!


So what does it look like in his room?


A nice new shiny Red desk!  It totally makes his room pop!  And he loves it!


Instead of the dated leaves and rivited hardware I added brushed nickle.


And of course we needed a new chair for the new desk!  So I spray painted a basic wood and white kitchen chair we had in the garage blue.  Then pulled out the handy dandy staple gun!


We now have a one of a kind Tony Hawk Skateboard Chair!


Ah, look at that!  There is nothing more full-filling then seeing something that was going to be put in the land fill re-purposed!


My little guy is so excited!

Sunday, April 10, 2011

Vintage Furniture gets a make over!

I love weekend yard sales!  Our city is a perfect place to go trolling around for vintage furniture that needs new life.  So back in early March the kiddo's and I were off to a playdate one Saturday morning while daddy was out skateboarding.  We were almost to the freeway and boom, yardsale!  The kids are yelling, daddy said no more chairs mommy!  But how could I not stop and "just look"? LOL!  Well long story short, I brought 2 of these beautiful arm chairs home for a whopping $25.00 for the pair.  The next day I took a trip to the local home depot paid $5.00 for some beautiful wood embellishments that the hubby helped me glue on and while we waited for them to dry he helped me decide on the fabric to recover the seats in.  So here is the before:


And here is the after of my NEW vintage living room arm chairs!  Yay!  I love them!  There is nothing you can't do with a little imagination, spray paint, glue & a staple gun!  Watch out! LOL!